
Windows 11 looks sleek and modern, but many of its default settings aren’t always the most practical.
With a few simple Windows 11 tips, tricks, and tweaks, you can customize the interface, improve productivity, and make the system work the way you want.
In this guide, we’ll walk through some of the most useful Windows 11 tweaking options every user should know to get the best experience from their PC.
Below Are The Essential Windows 11 Tips, Tricks & Tweaks Every New User Should Apply –
1: How to Move the Windows 11 Start Menu Back to the Left
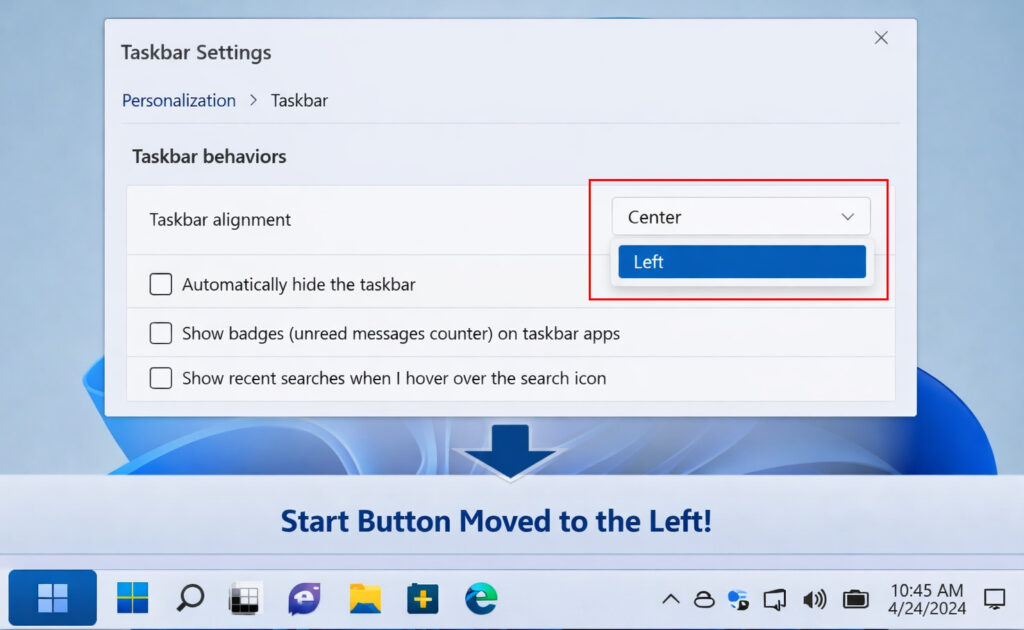
One of the most noticeable changes in Windows 11 is the centered Start menu and taskbar icons. While the new layout looks modern, many users prefer the classic left-aligned Start menu that has been part of Windows for decades.
Fortunately, Windows 11 allows you to move it back with a simple setting.
Steps to move the Start menu to the left
- Right-click on the Taskbar
- Click Taskbar settings
- Scroll down and open Taskbar behaviors
- Find Taskbar alignment
- Select Left
The Start button and taskbar icons will immediately shift to the left side, giving you a more familiar layout and making it easier to build muscle memory if you’re coming from Windows 10.
2: How to Restore the Classic Right-Click Context Menu in Windows 11
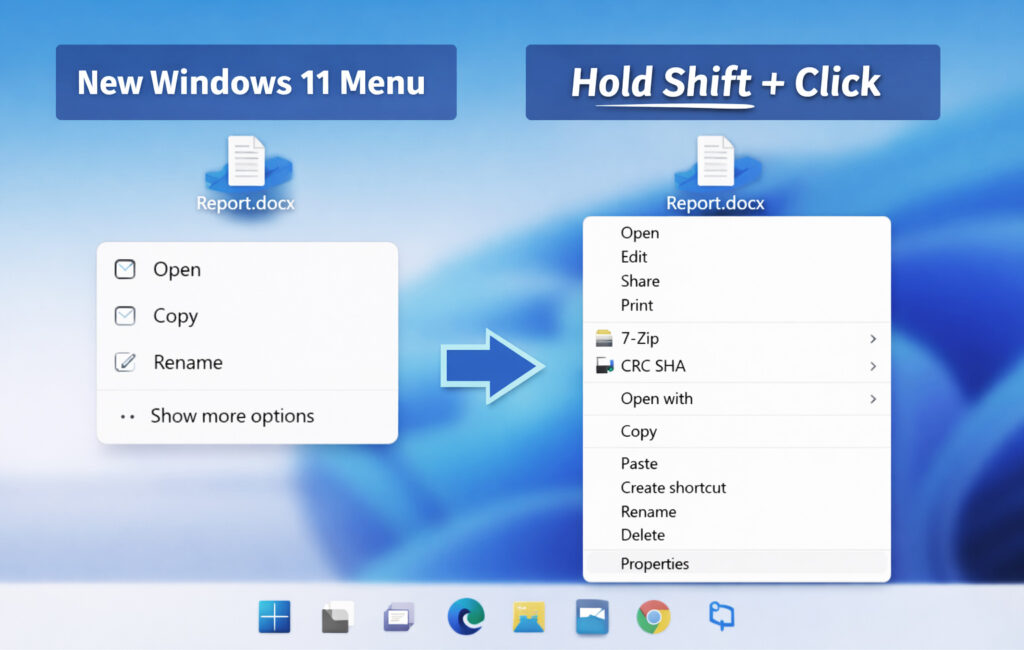
Windows 11 introduced a redesigned right-click context menu that hides many familiar options under “Show more options.” While the new design looks cleaner, it can slow down workflows for users who rely on the classic Windows context menu.
If you want quick access to the traditional menu with all the familiar options, there are a couple of easy ways to open it.
Method 1: Use the “Show More Options” Button
- Right-click any file or folder
- Click Show more options
This will open the classic Windows context menu, where you’ll see options like:
- Rename
- Send to
- Properties
- Third-party app actions
Method 2: Use the Shift + Right-Click Shortcut (Faster)
A quicker trick is to hold Shift while right-clicking a file or folder.
Shift + Right-Click
This instantly opens the classic context menu without needing to click “Show more options.”
If you frequently manage files in File Explorer, using the Shift + right-click shortcut can save time and make Windows 11 feel much closer to earlier versions of Windows.
3: How to Remove the “Recommended” Section from the Windows 11 Start Menu
The Recommended section in the Windows 11 Start menu shows recently opened files and apps. While some users find it useful, many prefer a cleaner Start menu without suggested content.
You can reduce or completely hide these recommendations from the Start menu.
Steps to disable Start menu recommendations
- Open Settings
- Go to Personalization
- Select Start
Now turn off these options:
- Show recently opened items in Start, Jump Lists, and File Explorer
- Show recently added apps
After disabling these settings, the Recommended section will no longer display recent files, making the Start menu cleaner and less distracting.
4: How to Open the Volume Mixer Quickly in Windows 11
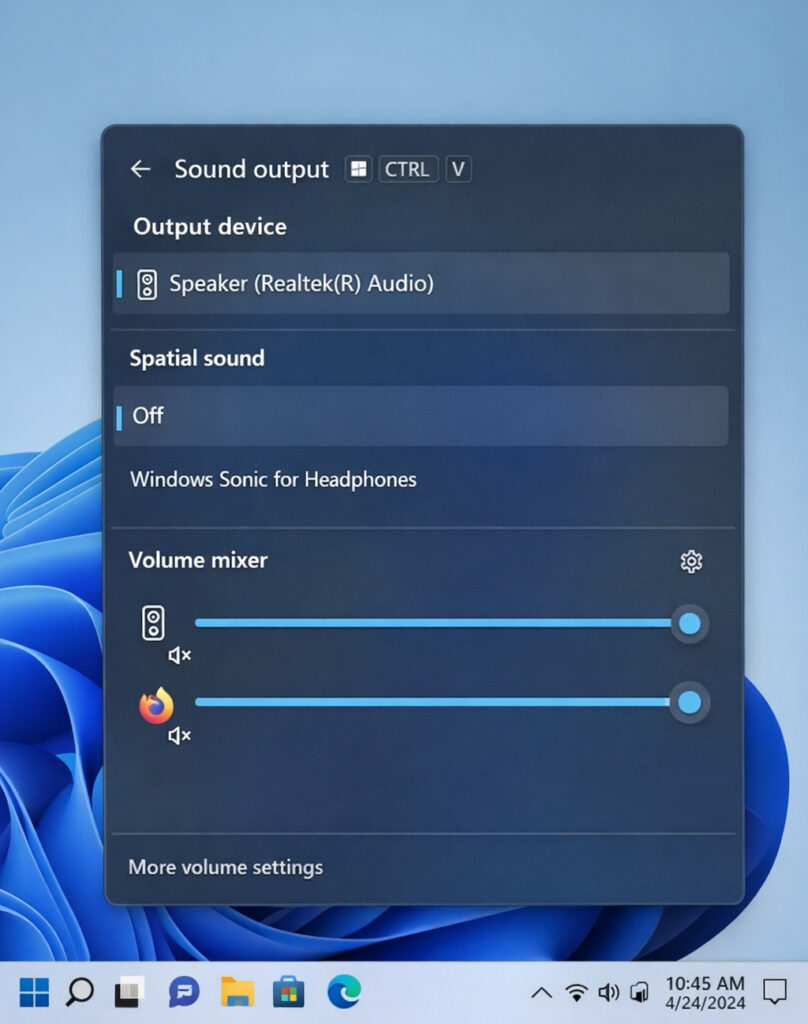
The Volume Mixer in Windows 11 lets you control the sound level of individual apps. This is especially useful when multiple applications are playing audio—for example, lowering the volume of a browser while keeping music or a meeting app louder.
While the feature still exists in Windows 11, it’s slightly less obvious than in earlier versions. Fortunately, there are quick ways to access it.
Method 1: Use the Volume Mixer Shortcut (Fastest)
Press:
Windows Key + Ctrl + V
This keyboard shortcut instantly opens the Volume Mixer, where you can adjust volume levels for each running app without navigating through settings.
Method 2: Use the Quick Settings Panel
Press:
Windows Key + A
This opens the Quick Settings panel, where you can quickly adjust the system volume and switch audio devices.
Using the Windows 11 Volume Mixer makes it much easier to manage audio when multiple apps are producing sound at the same time.
5: How to Disable Bing Web Results in Windows 11 Search
By default, the Windows 11 search bar displays both local results and web results powered by Bing. While this integration can sometimes be useful, many users prefer a cleaner search experience that focuses only on files, apps, and system settings.
Fortunately, you can reduce or completely disable Bing-related content in Windows search.
Method 1: Turn Off Search Highlights (Quick and Easy)
If you simply want a less cluttered search panel, disabling Search Highlights removes trending topics and suggested content.
- Open Settings
- Go to Privacy & Security
- Click Search permissions
- Scroll down to More settings
- Turn off Show search highlights
This removes trending topics and suggestions from the Windows search interface, making it cleaner and more focused on your local activity.
Method 2: Completely Disable Bing Web Results (Advanced Method)
If you want the Windows search bar to show only local results, you can disable Bing web results using the Windows Registry.
- Press Windows + R to open the Run dialog
- Type regedit and press Enter
- Navigate to:
HKEY_CURRENT_USER\Software\Policies\Microsoft\Windows\Explorer
- Right-click in the right panel and select
New → DWORD (32-bit) Value - Name it:
DisableSearchBoxSuggestions
- Double-click the entry and set Value data to 1
- Restart your computer or restart Windows Explorer
After this tweak, the Windows 11 search bar will stop showing Bing web results, allowing searches to focus only on apps, files, and system settings.
This small tweak can make Windows 11 search faster, cleaner, and more useful for everyday tasks.
6: How to Improve Laptop Battery Life in Windows 11 (Power Mode Settings)
If you use Windows 11 on a laptop, adjusting the power mode settings can significantly improve battery life.
Windows includes built-in power profiles that balance performance and energy consumption.
Steps to change the power mode
- Open Settings
- Go to System
- Click Power & battery
- Under Power mode, select Best power efficiency
This setting reduces background activity and optimizes system performance to extend battery life.
You can switch back to Best performance when running demanding applications.
7: How to Use Snap Layouts for Multitasking in Windows 11
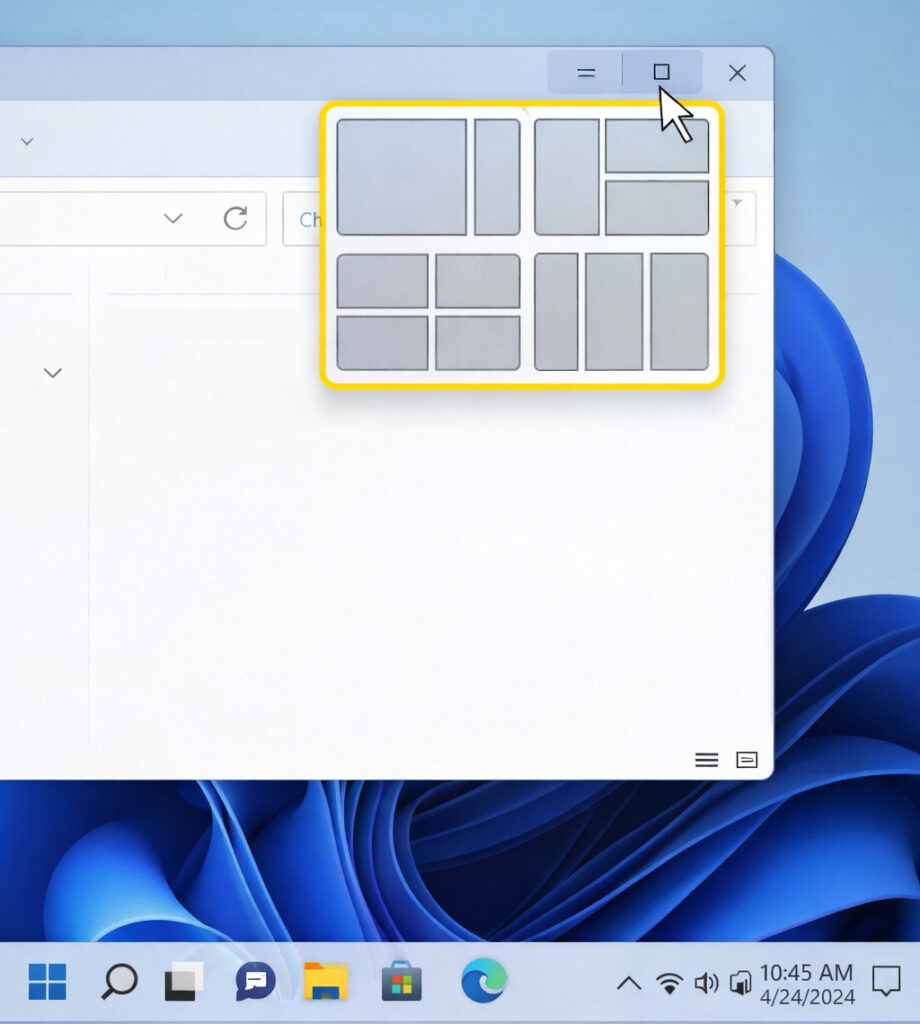
Snap Layouts are one of the most useful productivity features in Windows 11. They allow you to quickly organize multiple windows on the screen for efficient multitasking.
How to use Snap Layouts
- Hover your mouse over the maximize button of any window
- Choose a layout pattern
- Select where the window should snap
You can arrange apps side-by-side or in grid layouts, making it easier to work with multiple programs simultaneously.
Keyboard shortcut
Press:
Win + Z
This instantly opens the Snap Layout menu.
Using Snap Layouts is a great way to boost productivity when working with documents, browsers, or spreadsheets.
At a Glance: Windows 11 Translation Key
| If you want to… | Do this… |
|---|---|
| Move icons to the left | Taskbar Settings > Behaviors > Left |
| See the old Right-Click menu | Shift + Right-Click |
| Open the Volume Mixer | Win + Ctrl + V |
| Snap Windows perfectly | Hover over the Maximize button |
| Hide “Recommended” files | Settings > Personalization > Start |
More Helpful Windows 11 Tips
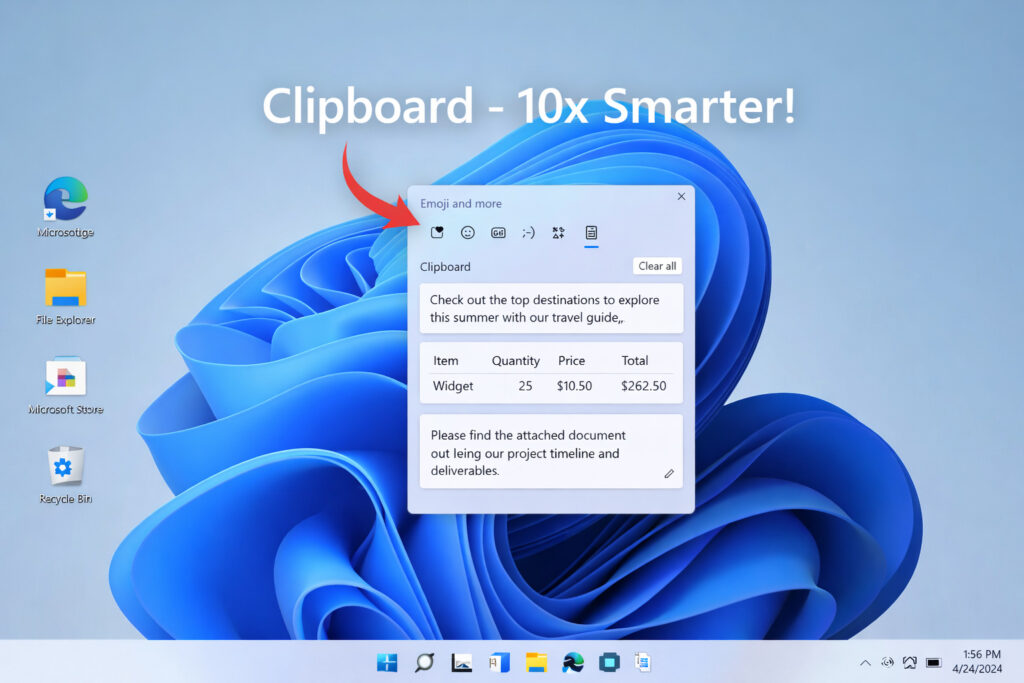
- Windows 11 Clipboard History: How to Enable and Use It
https://moderntechdigest.com/windows-11-clipboard-history/ - Move the Windows 11 Start Menu to the Left
https://moderntechdigest.com/windows-11-start-menu-move-to-the-left/ - Remove the Recommended Section from the Start Menu
https://moderntechdigest.com/remove-the-recommended-section-start-menu/ - Restore the Classic Right-Click Menu in Windows 11
https://moderntechdigest.com/restore-the-classic-right-click-menu/ - Speed Up Windows 10 and 11 (Proven Fixes)
https://moderntechdigest.com/speed-up-windows-10-and-11/
Closing Thoughts: It’s Still Your PC, Just Shiner!
Windows 11 is like a new pair of shoes. They’re a bit stiff at first, and the laces are tied in a way you aren’t used to. But once you move the Taskbar back to the left and learn the “Shift + Right Click” trick, it actually runs quite smoothly.
Don’t let the new look intimidate you—underneath the rounded corners, it’s still the same Windows you’ve used for years. It just needs a little bit of “home improvement” to feel right.